 This is a new garden I created early winter, trying to make the back shadier as it is a real heat trap.
This is a closer image taken about a month ago everything is thriving. We pulled out all the shrubs at the front and have put in more formal gardens with box hedging around the edges of all gardens. The garden bed on the left has a row of the hibiscus commonly known as the cotton tree, they have lovely big red shaded heart shaped leaves, I think they will look lovely when they grow and for a high hedge, have moved some roses from the bed on the right to this bed and they are now thriving, lots of blooms. The Jacaranda in the middle of the lawn is a mass of lovely mauve blooms and leave now.
 Hah, can you see John trying to quickly get inside, poor love he did all the hard labour, the old bushes took a lot of work getting out.
 Lovely pink rose next to the garage puts on a lovely show for a few weeks and that its lot for the year, but so worth it, looks lovely framed against that lovely blue sky (I can tell you I am over that blue sky now, have had a few scorchers).
 One of the baby doves I captured on film out the front, the doves have been very busy, babies everywhere.
 This lovely apricot is the last of the climbing roses on the side fences, puts on a lovely show too.
 Roses in the bird bath....
 The star jasmine outside the bathroom fills the house with the most intoxicating perfume from its abundant blossoms, has been flowering for almost a month. There I have probably bored you stiff with my garden post but I know my family in New Zealand enjoy seeing it, so just skip through and look at the photo's. Bye for now Jacky


 To make your covers measure your folded pages, and using bookboard or something similar. I used a thinner more flexible bookboard for this one, as I am hoping she will take it in her schoolbag and it will get nice and shoddy from regular use. I also rounder the outside edges to stand up to rough treatment. For the spine using the same bookboard place all your folded pages into a pile inside the covers, measure from back cover to front cover with all pages in between, add a small bit extra to allow for book opening and shutting. (if you do not allow this gap your journal will not sit right.
 Above is folded cover waiting to be painted.
 Make a template for binding your journal. Measure the height of your pages from top to bottom. I also make a cross on the bottom of template to make sure that I always have that mark on the bottom, just in case I am out a bit in my measurements. It is possible you know. Mark in the centre page of your signatures making sure x is on bottom. Also make sure you have your pages up the right way, also possible to do believe me. Pearce through with a awl push it in well to make your holes big enough. Mark your holes in your spine allowing a space between each row to allow for thickness of signatures. You can use either an awl or if you have a Japanese screw punch use one of the smaller hole punch attachments as you only want a hole big enough for your binding thread. Binding Thread I must confess, here in Australia where its not always possible to get the authentic products we improvise, and I use Oven string, I figure if its strong enough to hold a chicken together cooking in the oven its strong enough to hold a little old journal together. For ease of binding and keeping the string tight I also run the string through a wax block, candle will also work just place string on candle and draw string through several times. To bind I use a long needle 3 or 4 inches long with a hole big enough to thread the string through.
 Above is the first Paper Journal finished. I have used the luscious Golden Green Gold on this one, painted a face on watercolour paper, sewn onto Blue cardigan St Cecilia - Waterhouse paper with black thread as I like the look of paper sewn onto other paper, I thought this paper matched the background of the image I had painted. You don't have to put a painted image you can just make a collage, if you make a paper collage, make sure you seal it, I use Golden Matt medium. I have left the back and inside covers painted with no collage as I am hoping my granddaughter will put what she likes on it.
 This is the same journal standing up so you can see the stitching on the spine, to match the colour of the cover I painted the string with green gold fluid. This Journal I have used heavier bookboard, it shouldn't bend at all. This journal is bigger at 13 3/4 x 9 1/2 inches than the burnt orange one at 8 x 10 inches. Wow that was an epic entry, I hope I have explained it clearly as putting the journal together correctly is very important to the overall look of your journal. Don't forget to send me photo's of your finished journals, I would really love to see them. Also if there is anything I haven't explained well enough please put it in the comments, this gives me a lot of good feedback.
 This one is after I have added gesso.
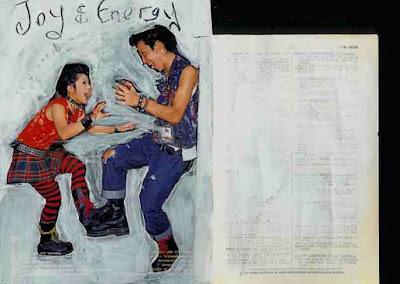
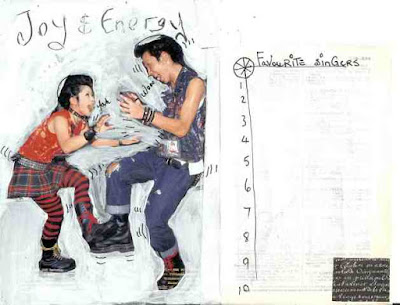
 And the finished pages waiting for the recipient to add script or more doodling. On the left of the page cut out from a teens magazine, cutting away all the background. Glue down with glue stick, glue a piece of scrap paper across bottom, great way to use up your scrap paper. Using a 8B graphite pencil draw around the edges where you would have shadows then smudge with a rubbing pencil (one of those firm rubber shaped like a pencil with a point on each end. These are really great for making shadows. On the right page using Pitt brush pens draw lines down from the figure every 2nd one draw stripes in two different colours and draw dots in the other space. Using a fine line black pen out line each stripe to define.
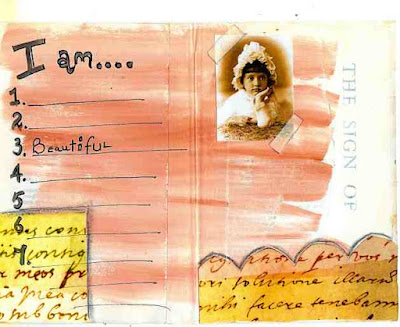
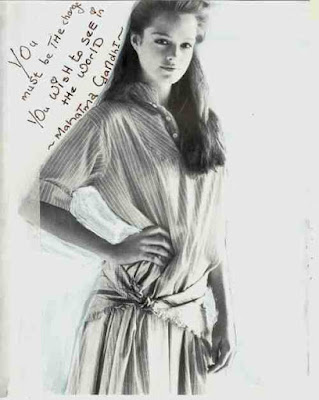 All that I have done with these pages is to write a quote on this one with a black fine line pen.
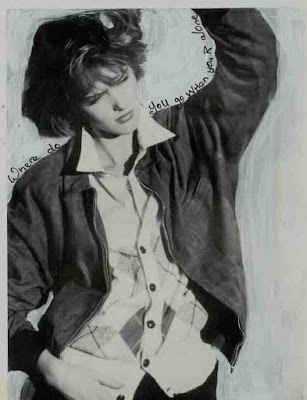 And this one a prompt for the recipient to continue with.
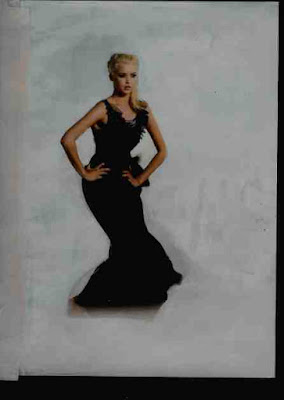
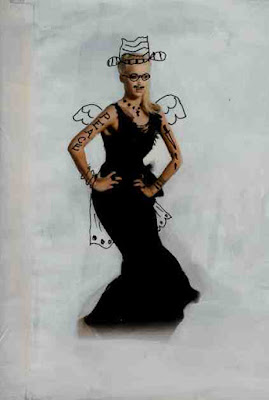 With your black fine line pen, go for it, tats, wings, extra skirt, bangles and a hat, get the idea, so much fun I think she looks much more interesting now, journal ling can be added into all the white spaces. Golden gesso is a good substrate for your pen
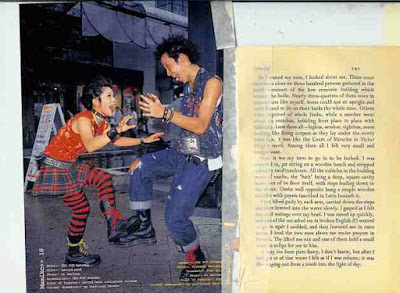
 Remember this fun couple with fine line pen give them some movement and words coming out of their mouths and on the right I have used a prompt from Sabrina Ward Harrison's books, my favourite. Another scrap of paper on the bottom.
 Use your favourite stamps mine are Nick Bantock (so quirky) using Pitt brush pens make a ribbon border around the crab and shade with graphite pencil and smudge, SWH prompts to get your ideas flowing. I used the black India Ink stamp pad as I find it nice and juicy.
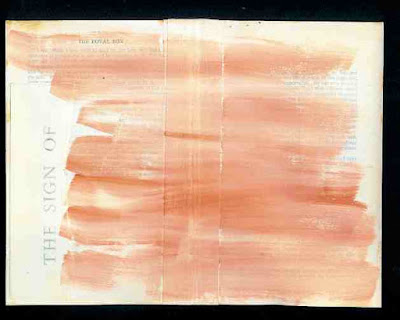
 Add scraps of paper one on right I have scalloped the edges and shaded. SWH prompts, a coloured photo with snips of masking tape on corners.
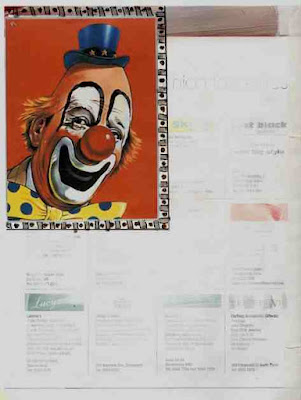 This one a clip art clown with a border done with Pitt brush pens (one of my favourite tools).
 This one is painted just with gesso, can you see the script through the gesso
 remember this fun one, gesso around the figures, then while gesso is wet use the other end of your paint brush to write some words or patterns. Page on the right is the one I ripped and I glued another page on top. Stronger page.
 Page out of bridal magazine, these pages are very shiny and paint doesn't want to adhere to it but the gesso is fine.
 Did you notice this image with all its dark background, whiten out with gesso and she floats with her wings spread out. This will give you plenty of options for next stage.
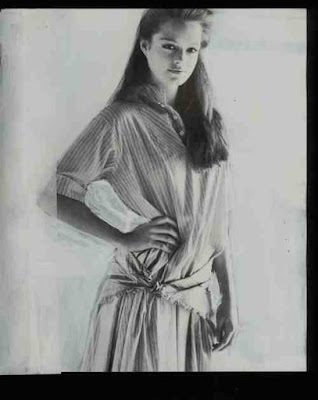
 This page is one of the bigger pages and I have only scanned one side. This page is out of the vogue book, I really like these, the pages aren't shiny and seem to take the gesso better, doesn't she stand out on the page.

 These pages from the voque book, nice sturdy pages, join your pages together with wide 3 1/2 cm wide masking tape (the one I am using is smoother than some, when I join 2 pages together I leave just a little gap.
  These are pages from old books, nice and sturdy, I like to separate the ones with images with these pages.
 These are the amazing pictures out of the freshfruit magazine, just wait and see how these come out after further treatment.
 This was way too much fun, as you can see I don't have a very straight eye, practise will be needed here.
 Love the doodling, you can do it while watching television too.
 I would recommend anyone who cannot get to classes the online classes are a good way to try different techniques. I had trouble with the videos, they took over half an hour to download and then when trying to view would only go so far, stop then go back to the beginning, I gave up in the end, I am afraid I don't have a lot of patience with computers, a love/hate relationship, have nearly sent it flying out the door on several occasions. The workshop I did was Pam Carikker's Shades of Grey.